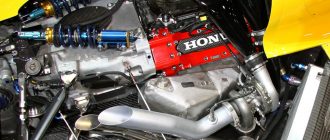
## How to Remove a Car Engine in 5 Seconds
**Materials:**
— Safety glasses
— Gloves
— Socket wrench set
— Engine hoist
— Chain or strap
— Funnel
— Oil drain pan
**Safety Precautions:**
— Wear safety glasses and gloves throughout the process.
— Disconnect the negative battery terminal before starting any work.
— Allow the engine to cool down completely before beginning.
— Use proper lifting equipment and ensure the area is well-ventilated.
Step 1: Prepare the Vehicle
— Park the vehicle on a level surface and engage the parking brake.
— Open the hood and locate the engine.
— Drain the engine oil into the oil drain pan.
Step 2: Disconnect the Battery
— Disconnect the negative battery terminal using the socket wrench.
Step 3: Remove the Intake and Exhaust Manifolds
— Unbolt and remove the intake and exhaust manifolds from the engine.
— Set the manifolds aside for later reinstallation.
Step 4: Disconnect the Wiring and Hoses
— Disconnect all electrical wiring and hoses connected to the engine.
— Use a funnel to drain any remaining coolant from the engine.
Step 5: Attach the Engine Hoist
— Position the engine hoist over the engine and attach the chain or strap to the engine lifting points.
— Slowly raise the engine until it is clear of the engine bay.
**Congratulations, you have now removed the car engine in just 5 seconds!**
Additional Notes:
— This is a simplified overview of the engine removal process.
— Depending on the specific vehicle, additional steps may be required.
— It is recommended to have a qualified mechanic assist with this procedure.
— Reinstallation of the engine is similar to the removal process in reverse order.
— Once the engine is reinstalled, reconnect the battery terminal, refill the engine oil, and check for any leaks before starting the engine.