- How to Take an Engine Out of a Car
- Introduction
- Tools and Equipment
- Safety Precautions
- Step-by-Step Instructions
- 1. Drain the Fluids
- 2. Remove the Accessories
- 3. Disconnect the Wiring
- 4. Remove the Intake and Exhaust Manifolds
- 5. Remove the Cylinder Heads
- 6. Remove the Pistons and Connecting Rods
- 7. Remove the Crankshaft
- 8. Remove the Engine Block
- Reassembly
- Conclusion
How to Take an Engine Out of a Car
Introduction
Taking an engine out of a car is a major automotive repair that requires specialized tools and knowledge. It is not a task that should be attempted by inexperienced mechanics. If you are not comfortable working on cars, it is best to leave this job to a professional mechanic.
Tools and Equipment
Before you begin, you will need to gather the following tools and equipment:
- Engine hoist
- Engine stand
- Socket set
- Wrench set
- Screwdriver set
- Oil filter wrench
- Coolant drain pan
- Transmission jack (if necessary)
Safety Precautions
Before you begin working, it is important to take the following safety precautions:
- Park the car on a level surface and engage the parking brake.
- Disconnect the negative terminal of the battery.
- Allow the engine to cool down completely before working on it.
- Wear safety glasses and gloves.
Step-by-Step Instructions
Once you have gathered the necessary tools and equipment and taken the appropriate safety precautions, you can begin the process of removing the engine from the car. The following step-by-step instructions will guide you through the process:
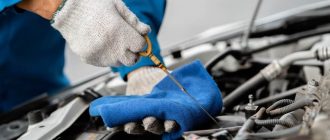
1. Drain the Fluids
The first step is to drain the fluids from the engine. This includes the oil, coolant, and transmission fluid (if necessary). To drain the oil, place an oil filter wrench on the oil filter and unscrew it. Allow the oil to drain into a drain pan. To drain the coolant, locate the drain plug on the radiator and open it. Allow the coolant to drain into a drain pan. To drain the transmission fluid, locate the drain plug on the transmission and open it. Allow the transmission fluid to drain into a drain pan.
2. Remove the Accessories
Once the fluids have been drained, you can begin removing the accessories from the engine. This includes the alternator, power steering pump, air conditioning compressor, and any other accessories that are attached to the engine. To remove an accessory, simply unbolt it from the engine and disconnect the electrical connector. Be sure to keep track of all of the bolts and nuts that you remove.
3. Disconnect the Wiring
Once the accessories have been removed, you can begin disconnecting the wiring from the engine. This includes the ignition wires, fuel injector wires, and any other wires that are connected to the engine. Be sure to label all of the wires that you disconnect so that you can reconnect them properly later.
4. Remove the Intake and Exhaust Manifolds
The next step is to remove the intake and exhaust manifolds from the engine. The intake manifold is located on the top of the engine, and the exhaust manifold is located on the bottom of the engine. To remove the intake manifold, unbolt it from the engine and lift it off. To remove the exhaust manifold, unbolt it from the engine and remove it from the car.
5. Remove the Cylinder Heads
Once the intake and exhaust manifolds have been removed, you can begin removing the cylinder heads. The cylinder heads are located on the top of the engine, and they cover the cylinders. To remove a cylinder head, unbolt it from the engine and lift it off. Be careful not to damage the cylinder head gasket when you remove the cylinder head.
6. Remove the Pistons and Connecting Rods
Once the cylinder heads have been removed, you can begin removing the pistons and connecting rods. The pistons are located inside the cylinders, and the connecting rods connect the pistons to the crankshaft. To remove a piston, use a piston ring compressor to compress the piston rings and then slide the piston out of the cylinder. To remove a connecting rod, unbolt it from the crankshaft and the piston.
7. Remove the Crankshaft
Once the pistons and connecting rods have been removed, you can remove the crankshaft. The crankshaft is located at the bottom of the engine, and it rotates the pistons. To remove the crankshaft, unbolt it from the engine and lift it out. Be careful not to damage the crankshaft bearings when you remove the crankshaft.
8. Remove the Engine Block
Once the crankshaft has been removed, you can remove the engine block from the car. The engine block is the main part of the engine, and it contains the cylinders, pistons, crankshaft, and other components. To remove the engine block, unbolt it from the car and lift it out. Be careful not to damage the engine block when you remove it.
Reassembly
Once the engine has been removed from the car, you can begin the process of reassembly. The reassembly process is simply the reverse of the removal process. Be sure to torque all of the bolts and nuts to the proper specifications.
Conclusion
Taking an engine out of a car is a major automotive repair that requires specialized tools and knowledge. If you are not comfortable working on cars, it is best to leave this job to a professional mechanic.