- How to Swap an Engine in a Car
- Planning Your Engine Swap
- Choosing the Right Engine
- Gathering the Necessary Parts
- Creating a Timeline
- Preparing for the Engine Swap
- Clearing Out Your Garage or Workspace
- Gathering the Necessary Tools
- Disconnecting the Battery
- Removing the Old Engine
- Draining the Fluids
- Disconnecting the Wiring
- Removing the Engine Mounts
- Installing the New Engine
- Installing the Engine Mounts
- Connecting the Wiring
- Filling the Fluids
- Starting the Engine
- Driving the Car
- Conclusion
How to Swap an Engine in a Car
Swapping an engine in a car is a major undertaking, but it can be a rewarding experience. If you’re considering doing an engine swap, it’s important to do your research and make sure you have the skills and tools necessary to complete the job.
Planning Your Engine Swap
The first step in any engine swap is to plan the project. This includes choosing the right engine for your car, gathering the necessary parts, and creating a timeline for the swap.
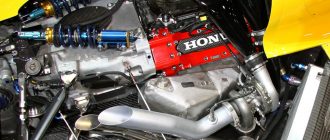
Choosing the Right Engine
When choosing an engine for your swap, there are a few things to consider:
* The power and torque output of the engine
* The size and weight of the engine
* The compatibility of the engine with your car’s transmission and driveline
* The cost of the engine and the parts needed to install it
Once you’ve considered these factors, you can start shopping for an engine. There are a few different places you can find used engines, including junkyards, online marketplaces, and private sellers.
Gathering the Necessary Parts
In addition to the engine itself, you’ll also need to gather a number of other parts to complete the swap. These parts include:
* A new engine mount kit
* A new exhaust system
* A new fuel system
* A new cooling system
* A new electrical system
* A new transmission (if necessary)
The specific parts you’ll need will vary depending on the engine you choose and the year, make, and model of your car.
Creating a Timeline
Once you have all of the necessary parts, you can start creating a timeline for the swap. This timeline will help you stay on track and avoid any delays. Be sure to factor in time for unexpected events, such as finding a problem with the engine or having to wait for parts.
Preparing for the Engine Swap
Once you have a plan in place, you can start preparing for the engine swap. This includes clearing out your garage or workspace, gathering the necessary tools, and disconnecting the battery.
Clearing Out Your Garage or Workspace
You’ll need a lot of space to work when you’re swapping an engine. Clear out your garage or workspace and make sure you have enough room to move around the car and the engine.
Gathering the Necessary Tools
You’ll need a variety of tools to complete an engine swap, including:
* A set of wrenches
* A set of sockets
* A set of screwdrivers
* A torque wrench
* An engine hoist
* A cherry picker
* A jack and jack stands
If you don’t have all of the necessary tools, you can rent them from a local auto parts store.
Disconnecting the Battery
Before you start working on the engine, disconnect the battery. This will prevent any electrical accidents from happening.
Removing the Old Engine
Once you have prepared for the engine swap, you can start removing the old engine. This is a complex process, so be sure to follow the steps carefully.
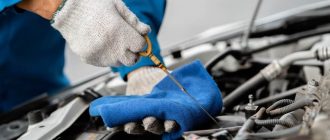
Draining the Fluids
The first step is to drain the fluids from the old engine. This includes the oil, coolant, and transmission fluid. Be sure to drain these fluids into a container and dispose of them properly.
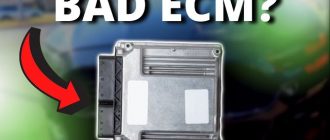
Disconnecting the Wiring
Once the fluids have been drained, you can start disconnecting the wiring from the old engine. Be sure to label the wires so you can reconnect them correctly later.
Removing the Engine Mounts
The next step is to remove the engine mounts. These mounts hold the engine in place in the car. Once the mounts have been removed, you can use an engine hoist to lift the engine out of the car.
Installing the New Engine
Once you have removed the old engine, you can start installing the new engine. This process is the reverse of the removal process.
Installing the Engine Mounts
The first step is to install the engine mounts. These mounts will hold the engine in place in the car.
Connecting the Wiring
Once the engine mounts have been installed, you can start connecting the wiring to the new engine. Be sure to connect the wires correctly, as any mistakes could lead to electrical problems.
Filling the Fluids
Once the wiring has been connected, you can start filling the fluids. This includes the oil, coolant, and transmission fluid. Be sure to fill the fluids to the correct levels.
Starting the Engine
Once the fluids have been filled, you can start the engine. Be sure to check for any leaks or problems before driving the car.
Driving the Car
Once you have started the engine, you can take the car for a test drive. Be sure to drive carefully and listen for any unusual noises or vibrations. If you notice any problems, stop driving the car and have it checked by a mechanic.
Conclusion
Swapping an engine in a car is a major undertaking, but it can be a rewarding experience. If you’re considering doing an engine swap, be sure to do your research and make sure you have the skills and tools necessary to complete the job.