- How to Replace Rod Bearings with Engine in Car
- Introduction
- Tools and Materials
- Safety First
- Step 1: Remove the Oil Pan
- Step 2: Inspect the Crankshaft
- Step 3: Remove the Connecting Rod Bolts
- Step 4: Remove the Connecting Rods
- Step 5: Inspect the Rod Bearings
- Step 6: Install the New Rod Bearings
- Step 7: Measure the Rod Bearing Clearance
- Step 8: Reinstall the Oil Pan
- Step 9: Refill the Engine Oil
- Step 10: Start the Engine and Check for Leaks
- Conclusion
How to Replace Rod Bearings with Engine in Car
Introduction
Rod bearings are essential components of an engine, as they allow the crankshaft to rotate smoothly and efficiently. Over time, rod bearings can wear out and need to be replaced. Replacing rod bearings is a complex task that requires specialized knowledge and tools. In this article, we will provide a step-by-step guide on how to replace rod bearings with the engine in the car.
Tools and Materials
Before you begin, you will need to gather the following tools and materials:
* New rod bearings
* Crankshaft socket
* Torque wrench
* Connecting rod bolts
* Plastigauge
* Engine oil
* Filter wrench
* Oil filter
Safety First
Before you start working on your car, it is important to take safety precautions. Wear safety glasses and gloves, and make sure that the car is parked on a level surface and the parking brake is engaged.
Step 1: Remove the Oil Pan
The first step is to remove the oil pan. This will allow you to access the crankshaft and connecting rods. To remove the oil pan, you will need to:
* Drain the oil from the engine
* Remove the oil pan bolts
* Carefully remove the oil pan
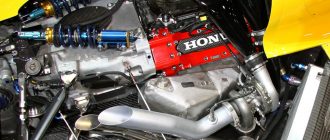
Step 2: Inspect the Crankshaft
Once the oil pan is removed, you will be able to inspect the crankshaft. Look for any signs of wear or damage, such as scratches, nicks, or gouges. If you find any damage, you may need to replace the crankshaft.
Step 3: Remove the Connecting Rod Bolts
The next step is to remove the connecting rod bolts. These bolts hold the connecting rods to the crankshaft. To remove the connecting rod bolts, you will need to use a crankshaft socket and a torque wrench.
Step 4: Remove the Connecting Rods
Once the connecting rod bolts are removed, you can remove the connecting rods. To do this, carefully lift the connecting rods off of the crankshaft.
Step 5: Inspect the Rod Bearings
Once the connecting rods are removed, you can inspect the rod bearings. Look for any signs of wear or damage, such as scratches, nicks, or gouges. If you find any damage, you will need to replace the rod bearings.
Step 6: Install the New Rod Bearings
To install the new rod bearings, follow these steps:
* Apply a small amount of engine oil to the new rod bearings
* Place the new rod bearings on the crankshaft
* Install the connecting rods over the new rod bearings
* Install the connecting rod bolts and tighten them to the specified torque using a torque wrench
Step 7: Measure the Rod Bearing Clearance
Once the connecting rod bolts are tightened, you need to measure the rod bearing clearance. To do this, you will need to use Plastigauge. Plastigauge is a soft, moldable material that you can place between the rod bearing and the crankshaft. When you tighten the connecting rod bolts, the Plastigauge will be squeezed out, and you can measure the thickness of the remaining Plastigauge to determine the rod bearing clearance.
Step 8: Reinstall the Oil Pan
Once you have measured the rod bearing clearance, you can reinstall the oil pan. To do this, follow these steps:
* Clean the oil pan mating surfaces
* Apply a thin layer of gasket maker to the oil pan mating surfaces
* Carefully install the oil pan
* Tighten the oil pan bolts to the specified torque
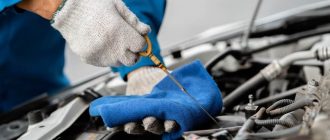
Step 9: Refill the Engine Oil
Once the oil pan is reinstalled, you can refill the engine oil. To do this, follow these steps:
* Remove the oil filter
* Install a new oil filter
* Add new engine oil to the engine
* Check the oil level using the dipstick
Step 10: Start the Engine and Check for Leaks
Once the engine oil is refilled, you can start the engine. Check for any leaks from the oil pan or the connecting rods. If you find any leaks, tighten the bolts or replace the gaskets as necessary.
Conclusion
Replacing rod bearings is a complex task, but it is possible to do it yourself with the right tools and knowledge. By following the steps outlined in this article, you can successfully replace the rod bearings in your car and restore your engine to proper working order.