Contents
How to Replace a Car Engine Belt
Materials You’ll Need
- New engine belt
- Wrench
- Socket set
- Jack and jack stands
Safety First
- Park your car on a level surface and engage the parking brake.
- Allow the engine to cool completely before beginning work.
- Wear gloves and safety glasses to protect yourself from potential hazards.
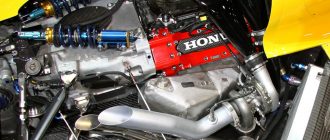
Step 1: Locate the Engine Belt
- Open the hood of your car and locate the engine belt.
- The belt is usually located on the front of the engine, running between the crankshaft and the camshaft.
Step 2: Loosen the Tensioner
- Using a wrench, locate the tensioner pulley for the engine belt.
- Apply pressure to the tensioner to loosen it, which will create slack in the belt.
Step 3: Remove the Old Belt
- Once the tensioner is loosened, remove the old belt from the pulleys.
- Be careful not to damage the pulleys or the belt.
Step 4: Install the New Belt
- Align the new belt with the pulleys.
- Start by placing the belt on the crankshaft pulley.
- Then, work your way around the other pulleys, ensuring that the belt is properly seated in each groove.
Step 5: Tighten the Tensioner
- Once the belt is in place, tighten the tensioner pulley.
- Use a wrench to apply pressure to the tensioner until the belt is properly tensioned.
Step 6: Check the Tension
- Using a socket set, tighten the bolts that hold the tensioner in place.
- Use a belt tension gauge to ensure that the belt is properly tensioned.
Step 7: Reassemble and Test
- Reassemble all the components that you removed during the process.
- Start the engine and let it run for a few minutes to check for any leaks or unusual noises.
Tips
- If you are not comfortable performing this repair yourself, it is recommended to take your car to a mechanic.
- Always refer to your car’s owner’s manual for specific instructions on how to replace the engine belt.
- Replace the engine belt at the recommended intervals specified by your car’s manufacturer.