## How to Flush Your Car Engine: A Comprehensive Guide
Flushing your car engine is a crucial maintenance task that helps remove contaminants, improve performance, and extend the lifespan of your vehicle. Here’s a comprehensive guide to help you do it yourself safely and effectively:
Materials You’ll Need:
— Engine flush product
— New engine oil
— New oil filter
— Drain pan
— Funnel
— Gloves
— Safety glasses
Step 1: Safety First
— Park your car on a level surface and engage the parking brake.
— Allow the engine to cool completely before you begin.
— Wear gloves and safety glasses for protection.
Step 2: Locate the Drain Plug
— Find the oil pan beneath your engine.
— Locate the drain plug at the bottom of the pan.
Step 3: Drain the Old Oil
— Place the drain pan under the drain plug.
— Using a wrench, carefully loosen the drain plug and allow the old oil to drain into the pan.
— Allow all the oil to drain out completely.
Step 4: Replace the Drain Plug
— Once the oil has drained, clean the drain plug and the drain pan thoroughly.
— Apply a small amount of new oil to the threads of the drain plug.
— Tighten the drain plug back into place using the wrench.
Step 5: Locate the Oil Filter
— Find the oil filter housing, which is usually located near the engine.
— Using an oil filter wrench, carefully remove the old oil filter.
— Lubricate the gasket of the new oil filter with a small amount of new oil.
— Install the new oil filter by hand-tightening it until it makes contact with the housing.
— Use the oil filter wrench to tighten it further, but avoid overtightening.
Step 6: Add the Engine Flush
— Pour the engine flush product into the oil filler hole.
— Start the engine and let it idle for the amount of time specified on the engine flush product label (usually 5-15 minutes).
Step 7: Drain the Engine Flush
— Repeat steps 3 and 4 to drain the engine flush and any remaining contaminants.
Step 8: Add New Engine Oil
— Remove the funnel from the oil filler hole.
— Pour in the recommended amount of new engine oil according to your vehicle’s specifications.
— Replace the oil filler cap securely.
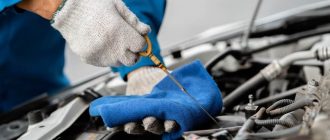
Step 9: Check the Oil Level
— Start the engine and let it idle for a few minutes.
— Turn off the engine and wait a few minutes for the oil to settle.
— Remove the oil dipstick, wipe it clean, and reinsert it.
— Pull the dipstick out again and check the oil level. It should be between the «min» and «max» marks.
Step 10: Reset the Oil Change Indicator (Optional)
— Locate the oil change indicator on your dashboard.
— Follow the instructions in your vehicle’s owner’s manual to reset the indicator.
Tips:
— Use an engine flush product that is specifically designed for your vehicle’s engine type.
— Do not exceed the recommended idle time for the engine flush.
— If your engine has high mileage or has not been flushed in a long time, consider using a more aggressive engine flush product.
— Change your engine oil and filter regularly according to your vehicle’s maintenance schedule.
— If you encounter any difficulties or are not comfortable performing this procedure yourself, seek the assistance of a qualified mechanic.
Conclusion
Flushing your car engine is a relatively simple and inexpensive maintenance task that can significantly improve the performance and longevity of your vehicle. By following the steps outlined in this guide, you can confidently flush your engine and keep it running smoothly for years to come.